Talofa Lava!
Samoa Language Week is from Sunday 24th May to Saturday 30th of May this year and the theme is Tapena sou ōso mo lau malaga or in English - Prepare yourself a gift for your travels.
This year's theme urges us to prepare for the journey ahead. It highlights the need to honour, respect and share the gifts of our life's journey.
Because of COVID-19, we couldn’t celebrate Samoa Language week with a big public event, so we thought we’d share a cool digital technologies activity that shares the gift of language through the use of digital technologies.
In our example, we introduced Samoa Language week. We suggest you record some tautalaga (phrases) in gagana Samoa (the Samoan language). Here is a good source of tautalaga on Manuatele.net. Click here to check them out.
Give it a go! Click on the green flag and let Sosefina tell you all about Samoa Language Week
Do you want to make your own?
If you are a faiaoga (teacher) in a NZ School, you can check out a slightly more complicated version of this Scratch program using Makey-Makey here. That link takes you to our digital wharenui where we share lesson plans with all our amazing teachers nationwide. It’s free to join and there is loads in there.
If you are a matua (parent) and you just want to give it a go with your fanau (children), keep reading!
Step 1: Go to https://scratch.mit.edu/, click on Create right at the top. If you want to save your work to check out for later or to share it with aiga (family) and uo (friends), then click on Join Scratch on the top right. You will have to help your child through this process, if they are under 13, you will need to confirm their account for them. MIT’s Scratch is completely safe and a great way for your kids to get into coding!
Step 2: Create or draw a suitable background. We downloaded our amazing sunset from Wikicommons, but there are many amazing places you can download images that are free to use, or even better, get your child to draw their own.
To upload a background, put your mouse over the “New Background” icon on the bottom right of the screen, and click on Upload. Find the image you have prepared and click on Open.
Watch this handy-dandy gif to see how.
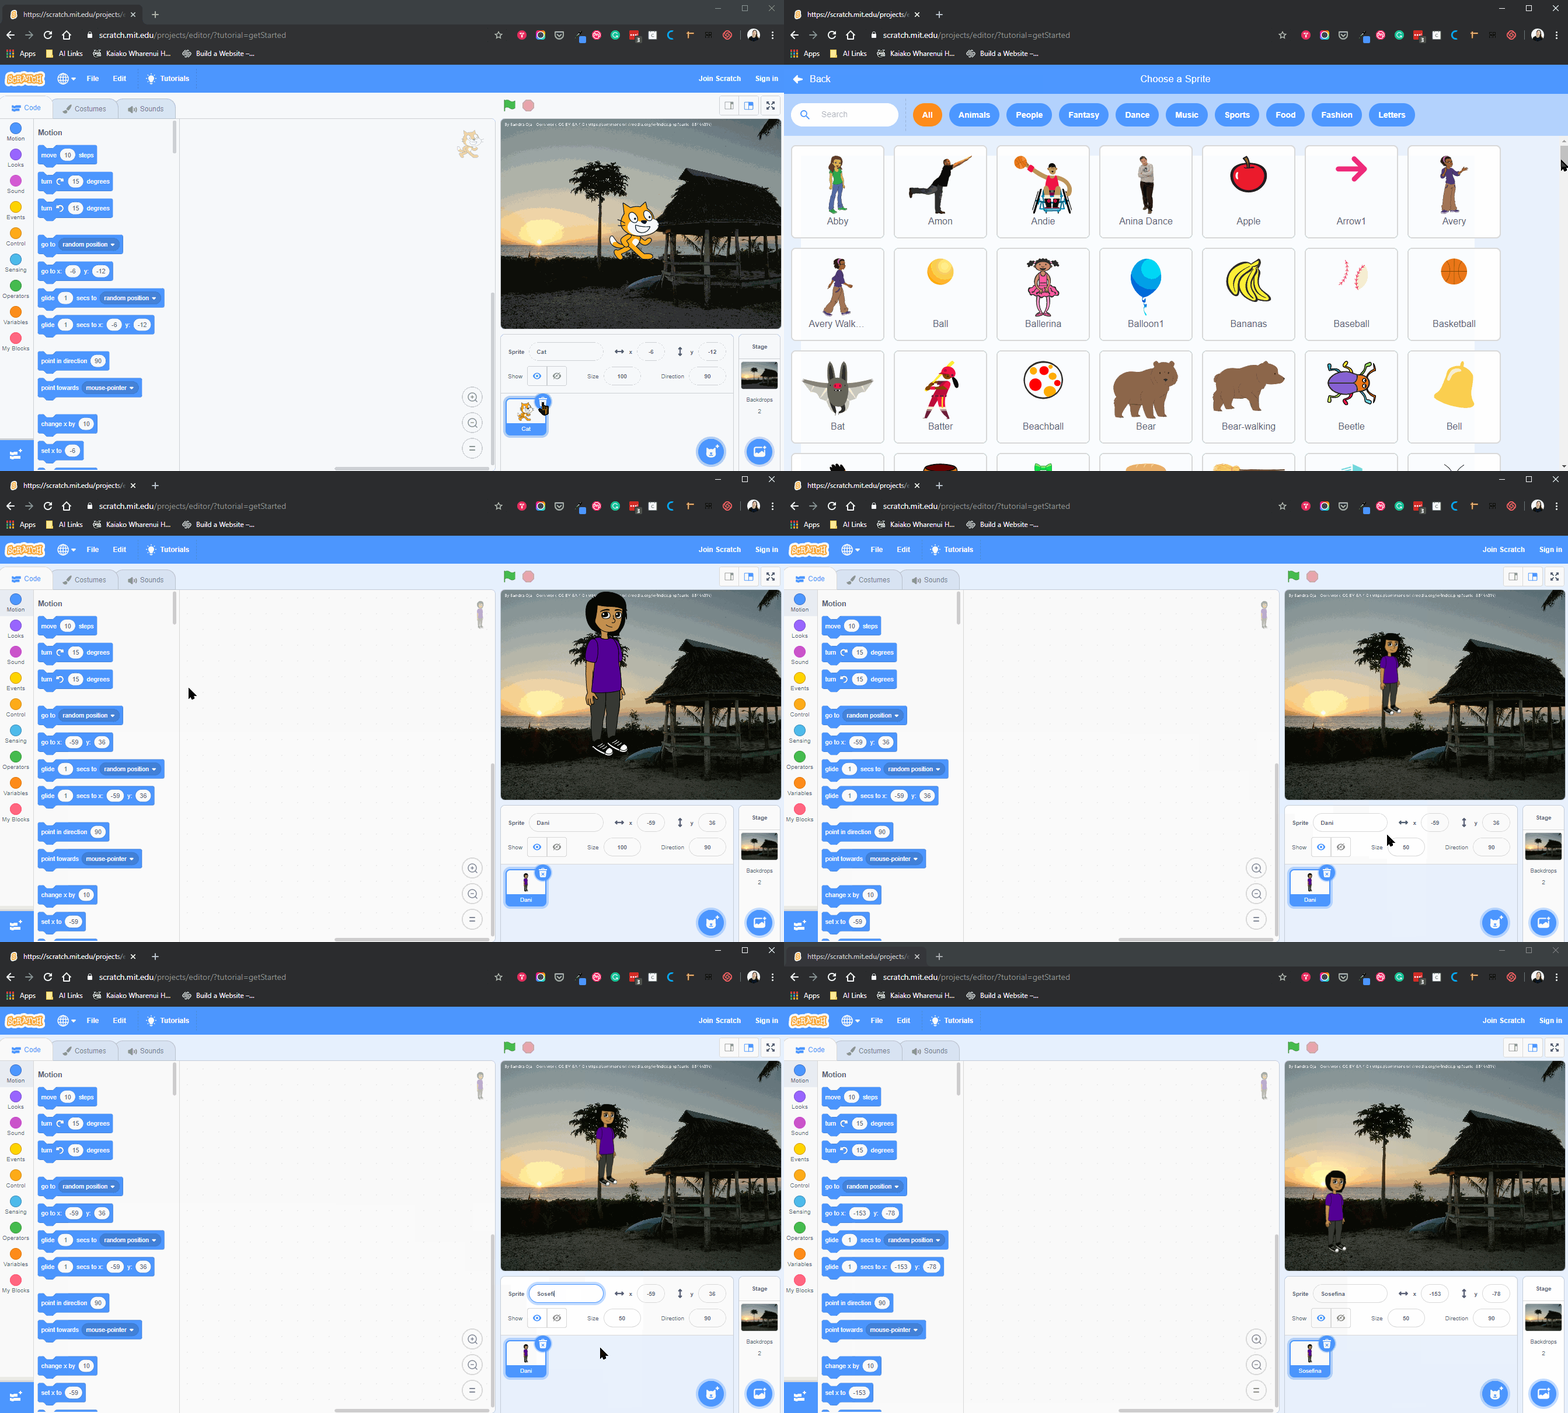
Step 3: Choose a suitable character. Our fafine (girl), Sosefina, is originally called Dani in the Sprites section. We first got rid of the cat (we love the cat, but I wanted someone that fit in a bit better on our beach. Click on the wee cross rubbish bin next to where it says Sprite 1 on the bottom right-ish of the screen. Then click on the Cat with a plus sign to find Dani. Also, as you will soon see, when you add Dani in, she’s a bit too big! You have to change the Size on the bottom right of the screen. Then, lastly, you should rename Dani (if you want to, you don’t have to), we chose the beautiful Samoan name Sosefina.
You don’t have to pick Dani, you can pick anyone else from the Sprite library, or your child could draw their own. Instead of clicking on the Choose Sprites button, they have to click on “Paint”, or Upload (if you have scanned in their artistic creation)
Check out this handy dandy gif to see how:
Step 4: Record your message. We need to decide what it is we want to say. Work with your child to figure it out together, perhaps choose a tautalaga from Manuatele.net. Type it into something so your child can read it clearly. You will also need it in Step 5! Click on your character, click on Code on the top left. Then in the Events Bubble on the left, you will find a command called When this sprite clicked. Drag that into your coding window. Then look in the Sound bubble. Find the one that says Play sound pop until done. Drag that into your coding window and click it to your yellow event block. Click on the down arrow next to pop and click on record. Get your child to record the message. You will have to have a microphone for this bit. When you have finished recording, click on Stop recording. Depending on how long the recording is, you might need to drag the arrows out to make sure you include the whole thing. Then click on Save. Delete the default “pop” by clicking on its rubbish bin with the cross, then make sure you select “Recording1” in the dropdown.
Check out this handy dandy gif on how to do it:
Step 5: Add the speech bubble. Click on your character, click on Code on the top left. Then in the Events Bubble on the left, you will find a command called When this sprite clicked. Drag that into your coding window. Then look in the Looks bubble. Find the one that says “Say Hello! for 2 seconds”, drag that into the coding window, and click it to the Yellow Event block. Then type your message you decided to say into the bit where it says Hello! (delete Hello first). Change the 2 seconds into the number of seconds you noted down in step 4 (ours was 20 seconds).
Check out this handy-dandy gif to see how:
And now you’re all done! Test it by clicking on your character and you should see the speech bubble and hear your narrative!
Ia soifua ma ia manuia - Be Well and Prosper!


